
Squashing Bugs
73 Days Until I Can Walk
I figured out the source of my rendering bugs! And it turns out that very same bug was causing the issue with collision detection too! The ray caster is working!
Of course the issue was an off-by-one error. The problem was that I followed F. Permadi’s tutorial a little too closely without accounting for the fact that we were representing walls differently. Allow me to explain.
Representing Wall Data
First, let’s talk about the fundamental difference between what myself and Permadi are doing. Consider the image below which shows conceptually how Permadi represents wall data. Hatching denotes walls and white spaces are open areas.
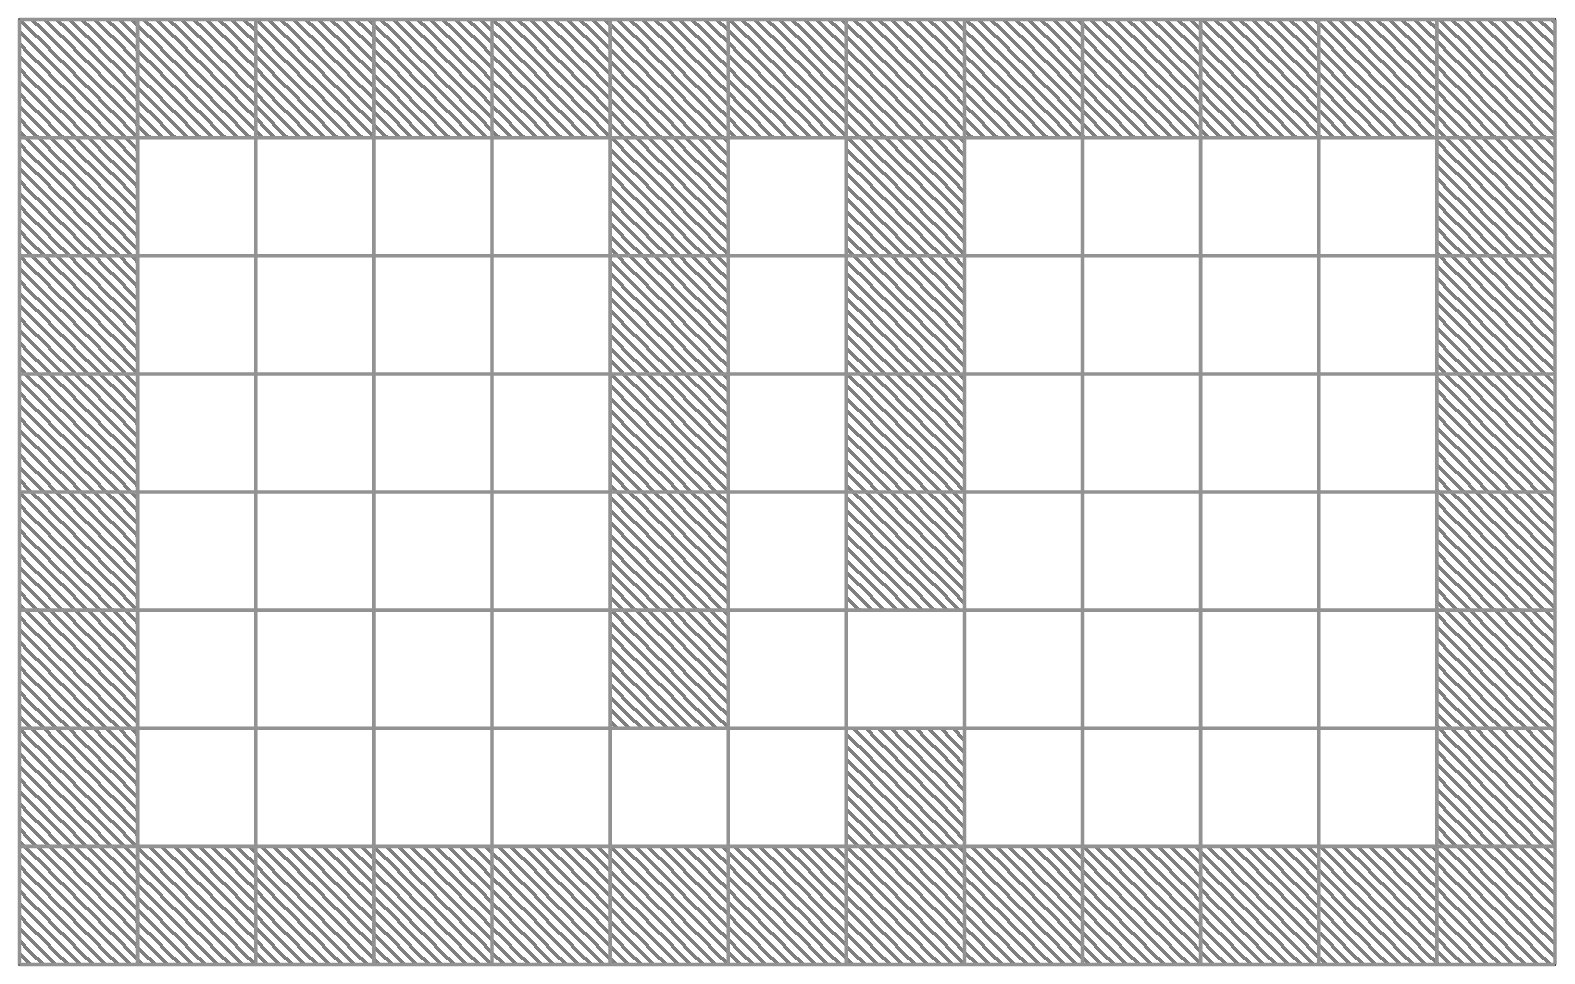
Permadi’s map is made up of a grid, where each cell in the grid is either open space or a wall. If Permadi places a wall, then a full square of his grid is converted into an inaccessible area for the user. Permadi’s map is made up of cube shaped walls which are placed in the environment.
Now, consider the image below showing the same map modelled using my approach (well, really Larry Myers’ approach, but I’m working from his notes here). In this image, bold lines denote walls.
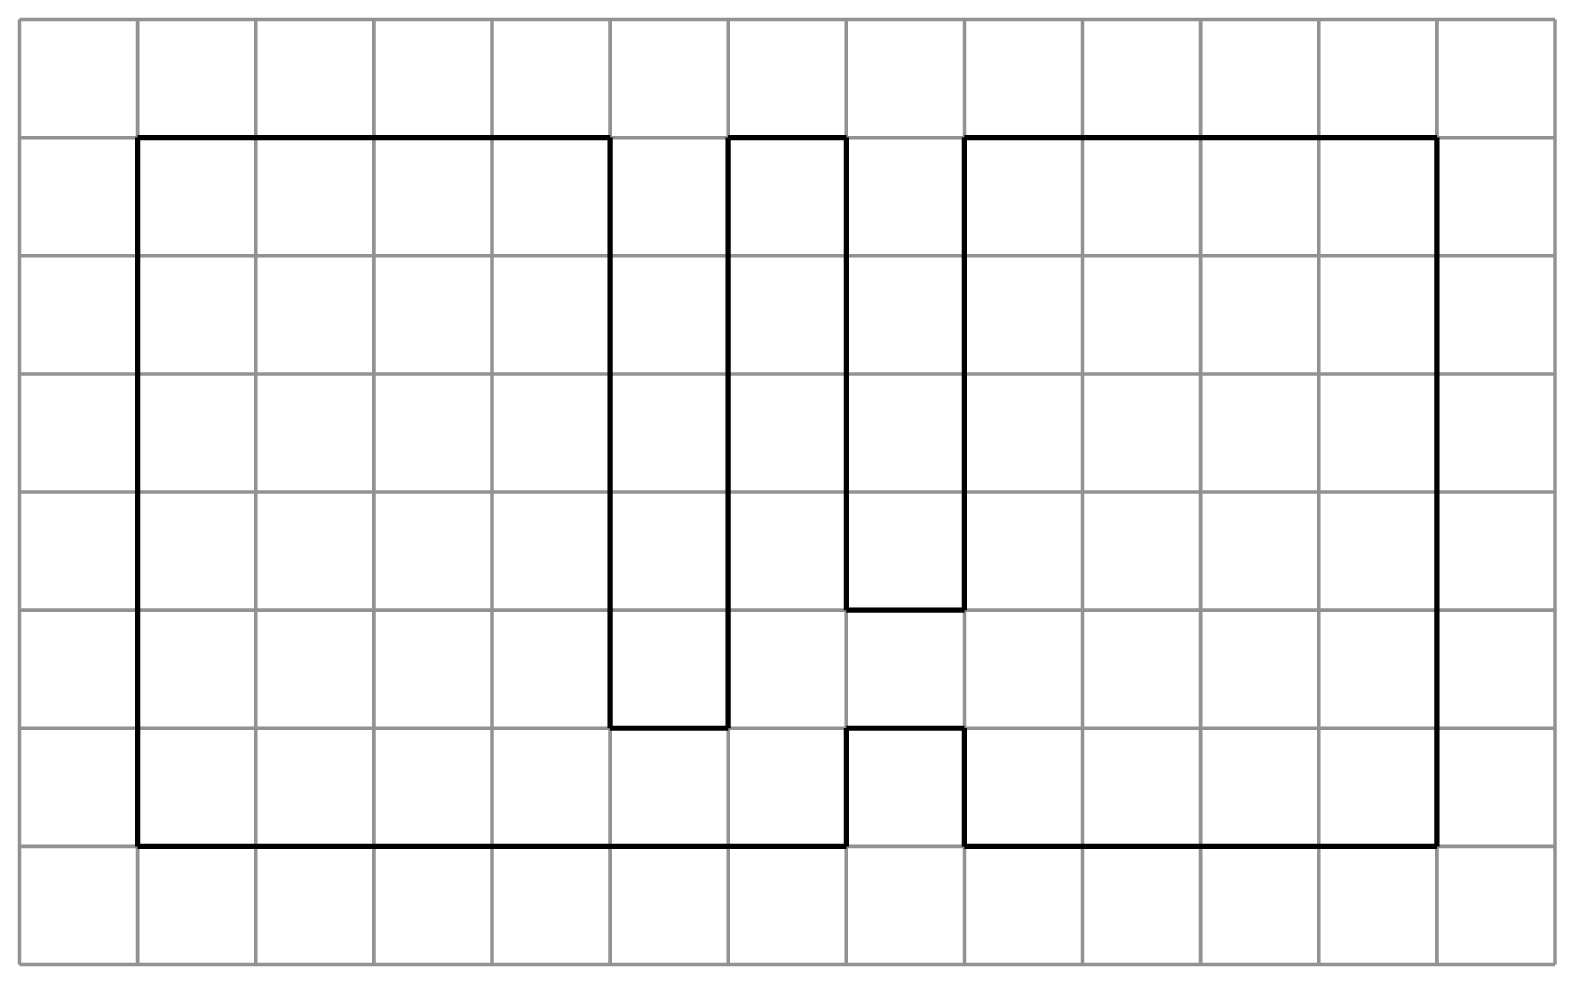
Where Permadi models his walls as cells, I model mine as the grid-lines between cells. To do this I use two arrays, one which stores information about walls moving from left to right (horizontal walls), and one which stores information about walls moving from top to bottom (vertical walls). Although this is a little more laborious, and requires more memory, the trade-off is that I get to have zero-width walls. So I can model something like this, which is impossible using Permadi’s approach.
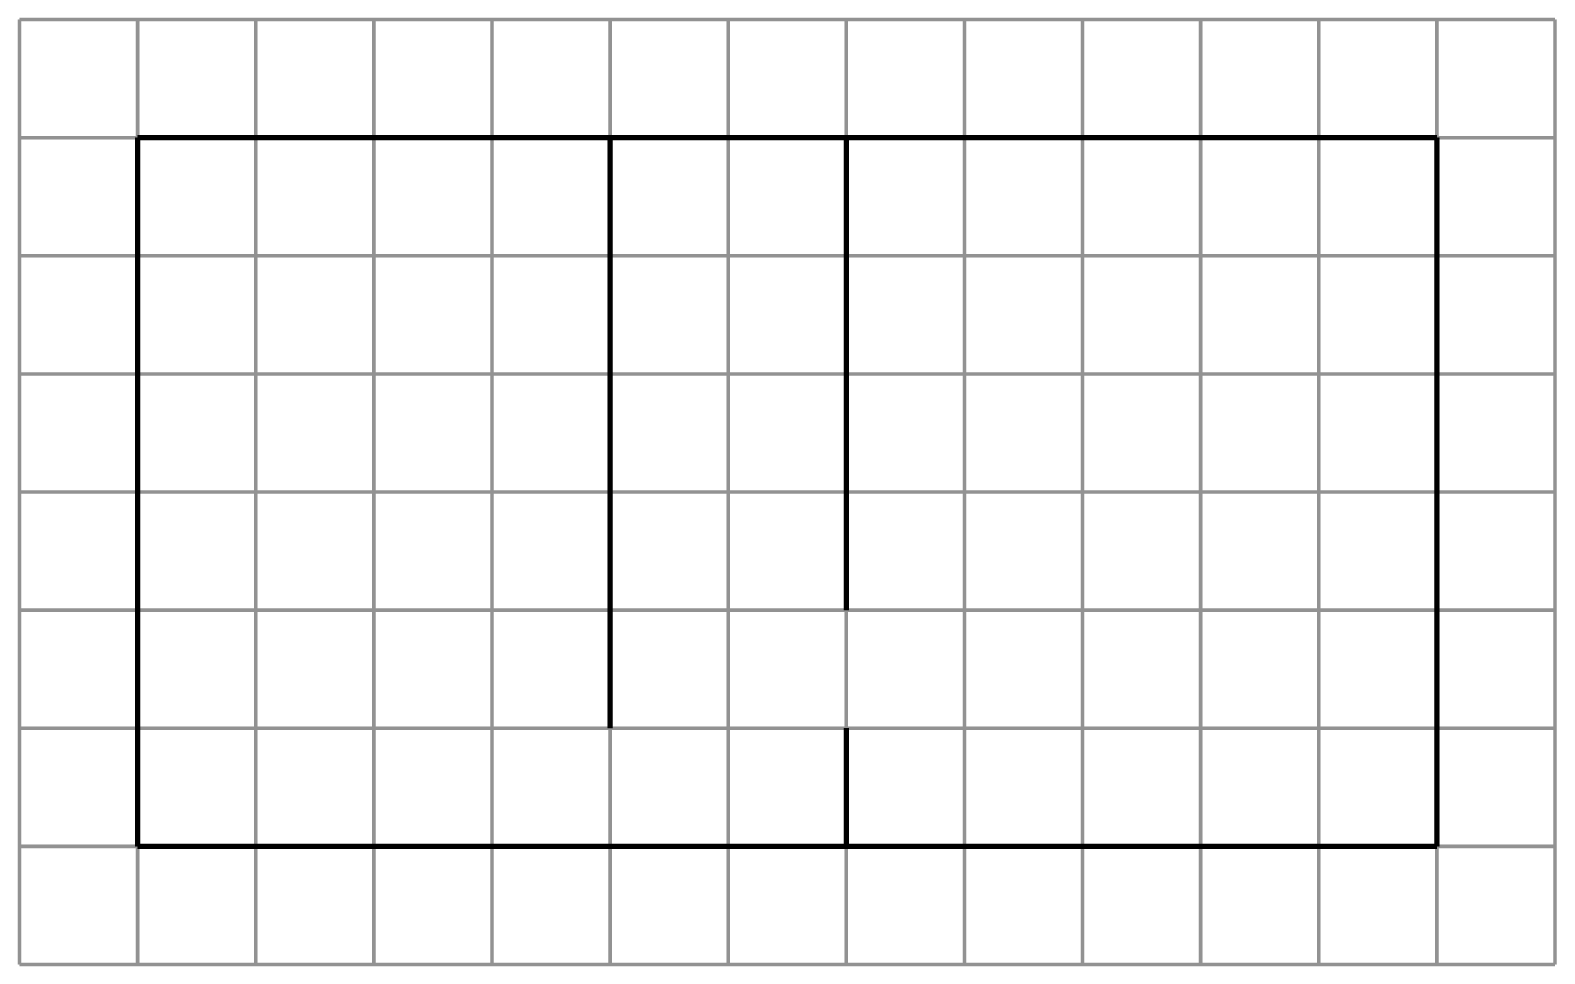
You may recognise this as the map used in the current demo of the engine. The main reason I have for modelling grid lines instead of cells is that it will let me do some interesting stuff in the long run once we start introducing transparency to the rendering engine.
So why did this mess up my rendering? Have a look at the gif below for an example of what went wrong, then let’s talk a bit about how the ray cast algorithm works.
The Ray Cast Algorithm
Ray casting is a very simple approach to rendering a scene. Starting from a point of origin (\(P(px, py)\) in the image below), rays are fired through a projection plane (your screen) into the scene. The rays travel until they either hit something, or exceed some upper limit on their length (e.g. because they go out of bounds of the map). Objects struck by rays are projected back onto the projection plane, scaled depending on how far the ray travelled before hitting the object. The further the ray travelled, the smaller the object will appear onscreen.
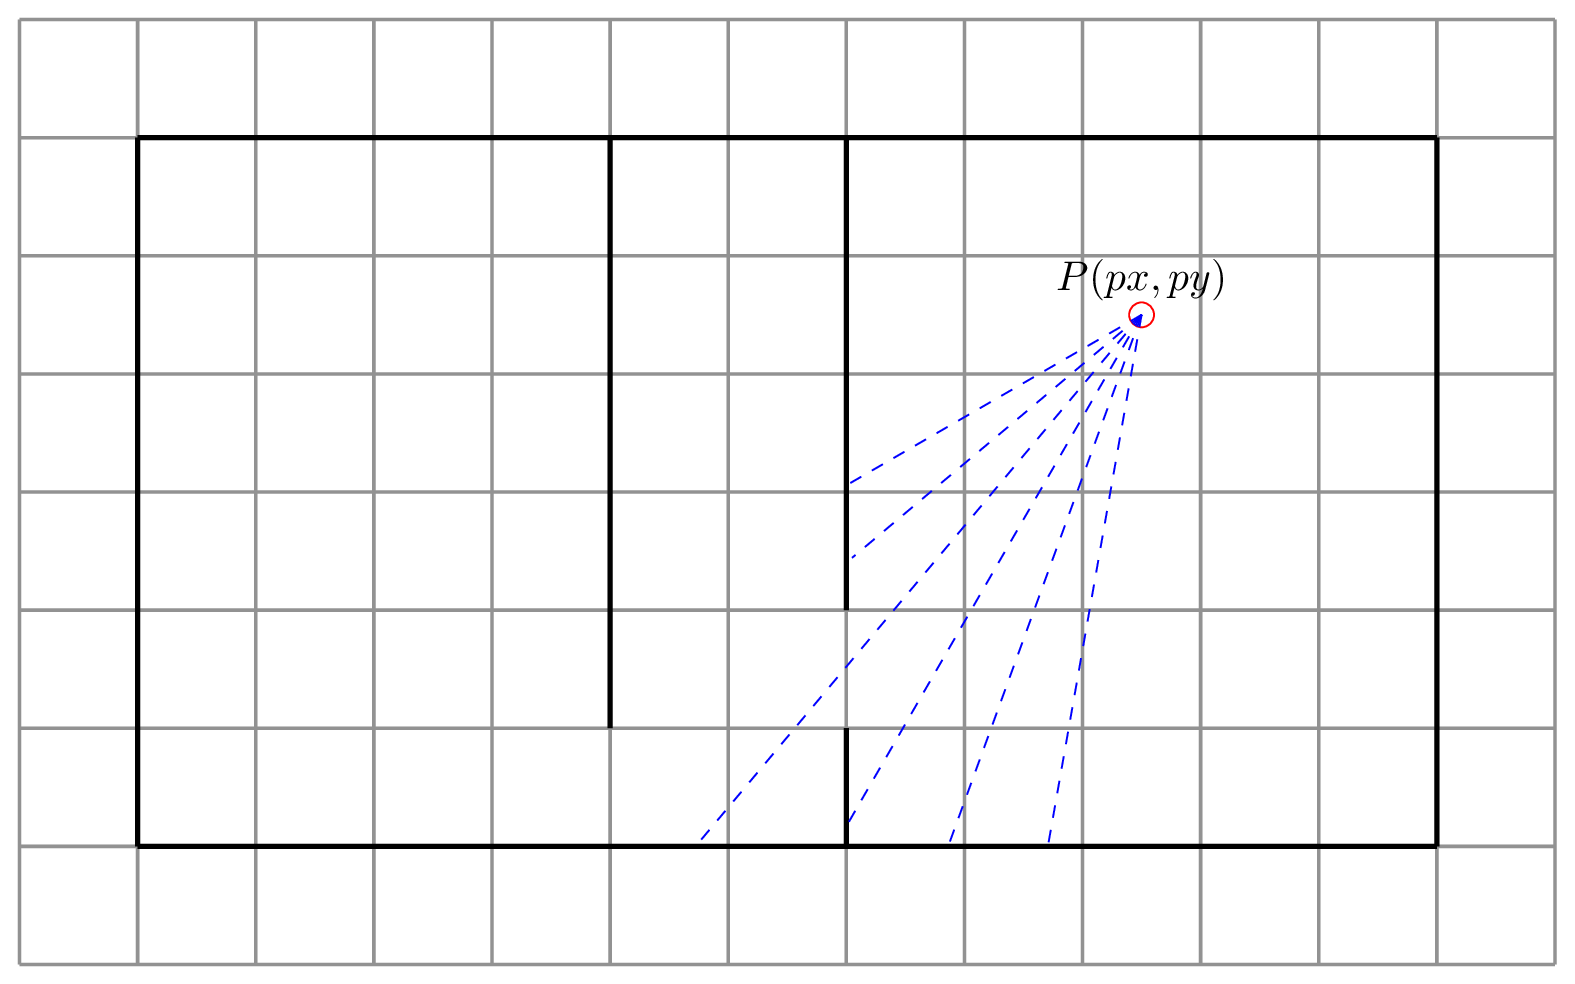
We could, of course, be totally naive about our ray cast implementation. Starting at \(P(px, py)\) we could increase the values of \(px\) and \(py\) by small amounts in the direction of the camera until the ray hits something or goes out of bounds. This is the approach taken by javidx9 in an early implementation of his olcPixelGameEngine. But this is inefficient. We will end up checking the same cells multiple times for each ray which slows down our engine. We can do better. Much better!
Let’s just focus on vertical walls for now. Consider the image below showing a single ray firing from a starting position \(P(px, py\)). The ray intersects two vertical grid lines at points \(B\) and \(E\). At \(E\) it finds a wall which should be projected back onto the projection plane.
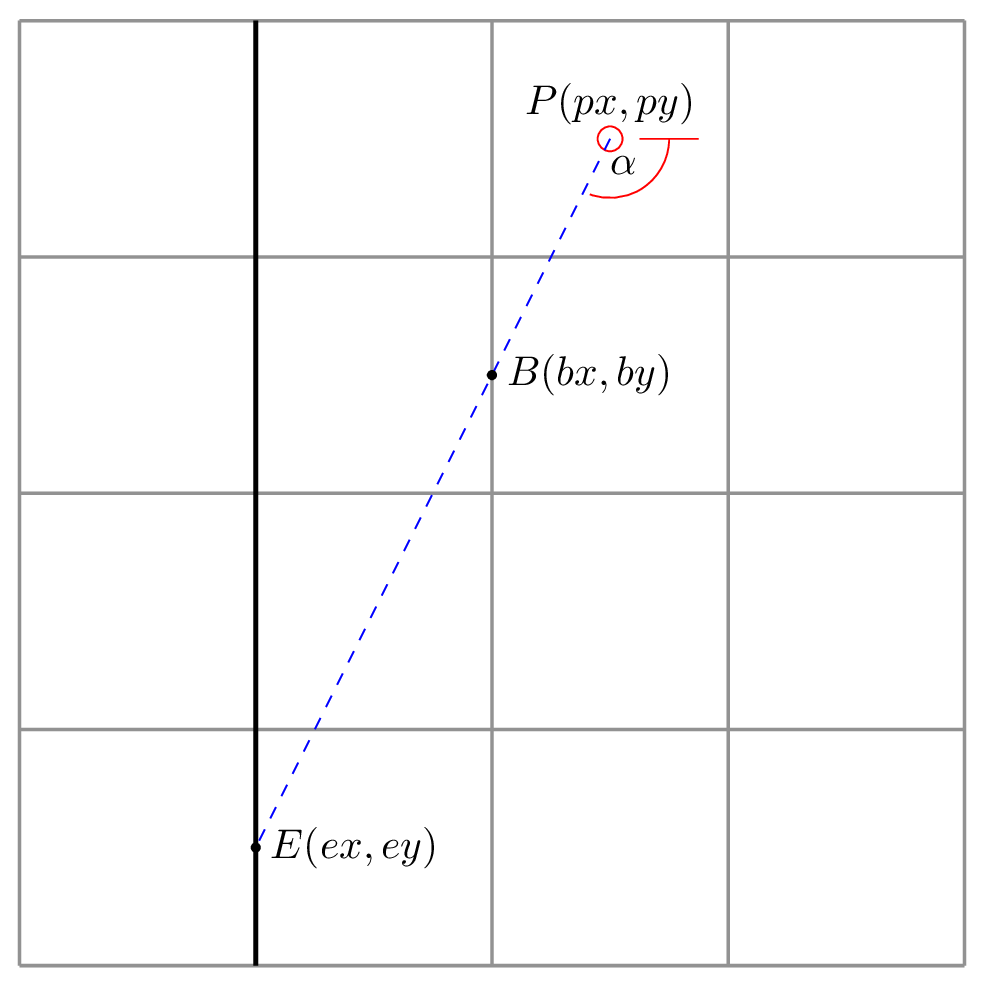
Let’s make some observations. First, after finding the first vertical grid line, the ray will always travel the same distance in the x-axis to reach the next one. If we assume that each cell is 64x64 units in size, then the ray will always travel 64 units to the left to find the next vertical line.
Second, as it happens, the ray will also always travel by a constant distance in the y-axis, although working out this value takes a little more work. The distance travelled in the y-axis is defined by the function:
\[\Delta y = 64 \times tan(\alpha)\]Where \(\alpha\) is the angle at which the ray was fired.
Before we can take advantage of this observation, however, we need to work out the distance from \(P(px, py)\) to the closest point of intersection on a vertical grid line. How we do this depends on whether the camera is facing to the left or the right.
For the x-coordinate, if the player is facing right, then the closest vertical grid line can be found at
\[bx = floor\left(\frac{px}{64}\right) \times 64 + 64\]That is, we find the nearest round multiple of 64 to \(px\), and then shift it once to the right to get the vertical grid line to the right of the player.
If the player is facing left, then we do the following:
\[bx = floor\left(\frac{px}{64}\right) \times 64\]This is the same idea without the shift to the right.
We can then work out \(ey\) with the following:
\[ey = py + (px - bx) \times tan(\alpha)\]With this done, we can now start casting rays, incrementing by constant values and leaping from grid line to grid line in search of walls without needing to move in tiny, unnecessary increments.
What Went Wrong
The problem lies in the equation for finding \(bx\) when the player is facing left.
\[bx = floor\left(\frac{px}{64}\right) \times 64\]Here is where the difference between Permadi’s implementation and mine differ, and this is where everything was going wrong. Because Permadi represents wall data as a single array, where each cell is a solid cube wall, he already knows that the cell occupied by the player does not contain a wall. If it did, then the player would be inside a wall. When finding the nearest vertical grid line to the player’s left, then he must begin his search one column to the left. Conversely if the player is facing right, his search begins one column to the right.
However, in my representation, I model the grid lines themselves, so even though the player is standing at \(P(px, py)\), to check for an adjacent wall to the left, I must start with the cell currently occupied by the player. Hence the offending line which caused so much trouble was:
\[bx = floor\left(\frac{p_x}{64}\right) \times 64 - 1\]That little subtraction meant that my rays would start firing one grid line too far to the left if the player was facing left. The problem was mirrored in the search for horizontal grid lines too. So my whole map was rendering with a slight shift down and to the right. Hence the collision detection was working fine, but at the extreme limit of the top and left of the map, the camera would clip through the shifted walls.
This also explains why walls were disappearing if viewed at too sharp an angle. Because they were slightly shifted, the ray that should intersect with them was actually bending around the back of the wall and striking the surface behind.
Conclusion
So there you have it! I spent most of the morning with a pen and paper trying to work out where I was going wrong before I finally stumbled on the answer.
I do have to say that if ever there was a valuable lesson I learned about programming when I was at college, it is this: stick with it. No matter how strange the bug, or how little you understand why things are going wrong, if you stick with it you will find an answer. I have never found a problem that I couldn’t either solve or work my way around just by spending enough time thinking about it.
Anyway, this means that I now have a working implementation of the ray cast algorithm. To round of the day I “borrowed” (read: totally stole) F. Permadi’s colour scheme for the walls, sky, and ground. I think the contrast and extra bit of shading gives the whole scene a little bit of depth that was lacking in my flat, two colour representation of the scene.
Tomorrow I will likely start working on texturing. I have no idea how I will load and work with image assets, so we’ll see how that goes, but progress has been good so far, so let’s just see what happens.